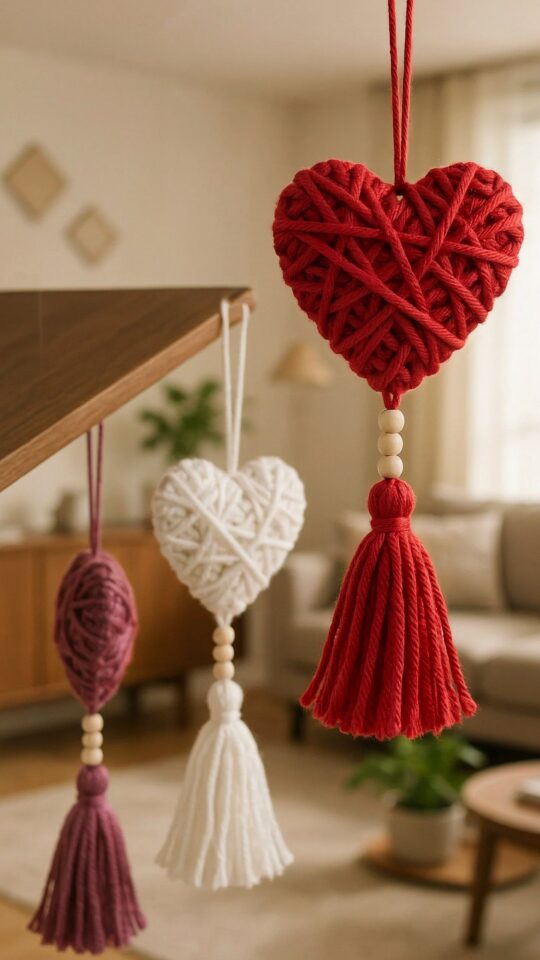
Why I Chose Dollar Store Supplies for This Project
When I first attempted a dollar store yarn heart decor project, I honestly expected the results to look a little cheap. I was wrong. With the right technique, these yarn hearts turn out soft, textured, and surprisingly elegant. The best part? You only need a few items from the dollar store plus a piece of cardboard. My total cost was under three dollars for a set of five hearts, and that included the yarn and a glue stick. For anyone looking to try yarnhearts on a real budget, this is the most forgiving and satisfying craft I have found.
I have made several versions of this project over the past year, and the dollar store version consistently looks just as good as the ones made with premium craft yarn. The key is choosing the right yarn weight and winding technique, which I will walk you through step by step. This tutorial is perfect if you want a valentinesdaycraft that also works for everyday cozy decor.
Gathering Your Materials from the Dollar Store
Before you start, take a quick trip to your local dollar store or a budget retailer. You probably already have some of these items at home. Here is exactly what you need:
- Cardboard. An old shipping box or cereal box works great. I used a pasta box lid for one batch.
- Yarn. Look for worsted weight acrylic yarn in any color you like. Red and blush pink are perfect for valentinesdaycraft, but navy or cream works well year round.
- Scissors. A sharp pair makes all the difference when cutting cardboard.
- Glue stick or white glue. Dollar store glue sticks hold fine, but if you have tacky glue at home, use that for a stronger hold.
- Optional. A piece of string or ribbon for hanging, and a dot of hot glue if you want extra security.
I recommend buying two skeins of yarn even for a small project, because the winding uses more than you might expect. Having a backup color also lets you experiment. For my first attempt I used a navy yarn and a pale peach, and the contrast looked lovely on a gallery wall.
Step by Step: Making the Yarn Wrapped Hearts
Start by cutting a heart shape from your cardboard. I traced a cookie cutter onto the box, but you can freehand a simple heart shape as long as the sides are smooth. The size should be about four to five inches wide for a nice display. If you want larger hearts, try using a paper plate as a template.
Once you have your cardboard heart, cut a small notch at the top center and bottom center. These notches help hide the yarn ends later. Now start wrapping your yarn. Hold the tail against the back of the cardboard and begin winding the yarn around the heart, going across the width. I wrap in an overlapping pattern so no cardboard shows through. This takes about fifteen minutes per heart depending on your yarn thickness.
When the heart is fully covered, cut the yarn and tuck the end under a few wraps near one of the notches. Use a tiny dab of glue to secure both the starting tail and the ending tail. Let the glue dry completely before handling the heart. For a cleaner finish, I often add one extra wrap around the whole outline of the heart to hide any gaps near the edges.
How to Turn Them into Beautiful Wall Art
These yarn hearts are surprisingly versatile. I hang mine using a simple loop of thin string glued to the back of the heart. Another easy method is to tape a small paperclip to the back and hang it from a pushpin. You can arrange a cluster of three or five hearts in a diagonal pattern on a wall for instant romantic wall art.
If you prefer a more polished look, glue the yarn hearts onto a canvas or a piece of cardboard covered with scrapbook paper. I made a small heart wreath by hot gluing seven hearts in a circle on a cardboard ring. That piece now sits on my mantel year round because the neutral yarn color blends with everything. The texture adds warmth without looking too seasonal.
Tips for Getting the Best Results with Budget Yarn
Dollar store yarn can sometimes be a bit thinner than name brand yarn, so I double up the strands. Simply use two ends of yarn at once while wrapping. This gives a thicker, more plush appearance and covers the cardboard faster. If you only have one strand, wrap tightly and overlap frequently to avoid gaps.
Another trick I learned the hard way: when you cut the notches,
#dollarstorediy #yarnhearts #budgethomedecor #valentinesdaycraft #easydiy
Leave a Comment